We've all seen the static armature balancers... you know the razor blades or the jeweler's poising tool. But the slickest balancers I've seen are those magnetic ones. They are great but they are pretty pricey. That said, I did some research on the webbernet and found this article in Slotcar Illustrated's forum by "jaybo" It was a great article and gave me a great start. If you are interested in making your own balancer then read on.
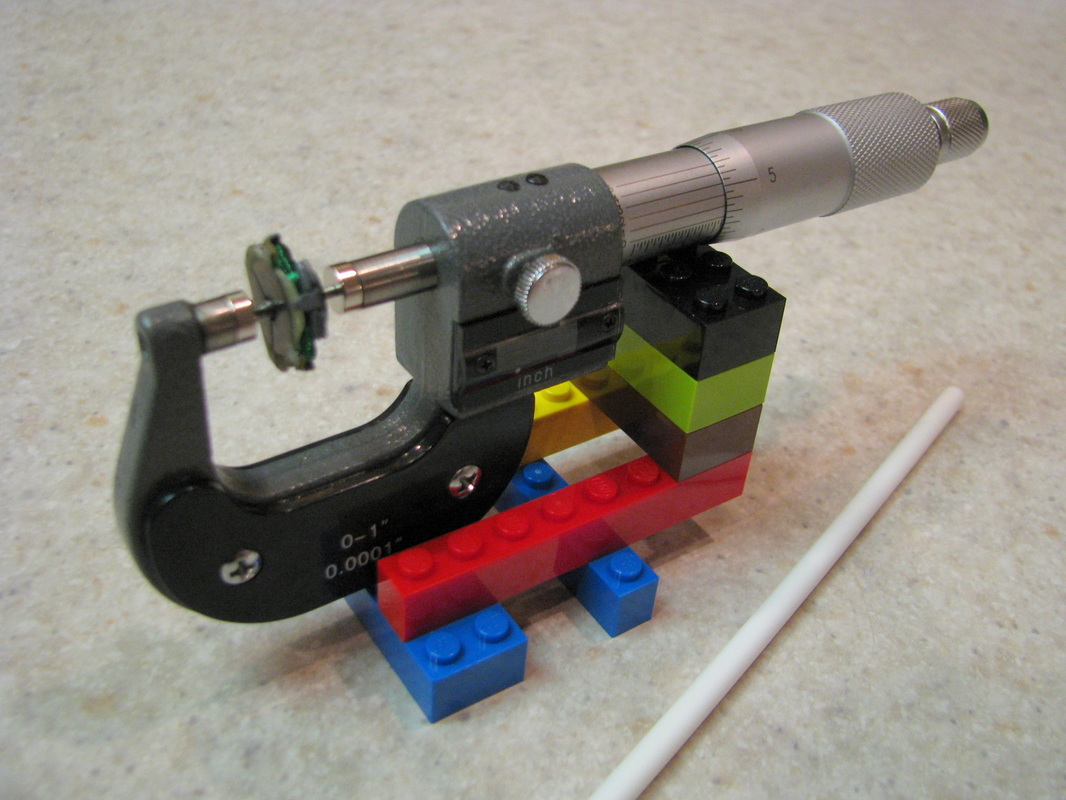
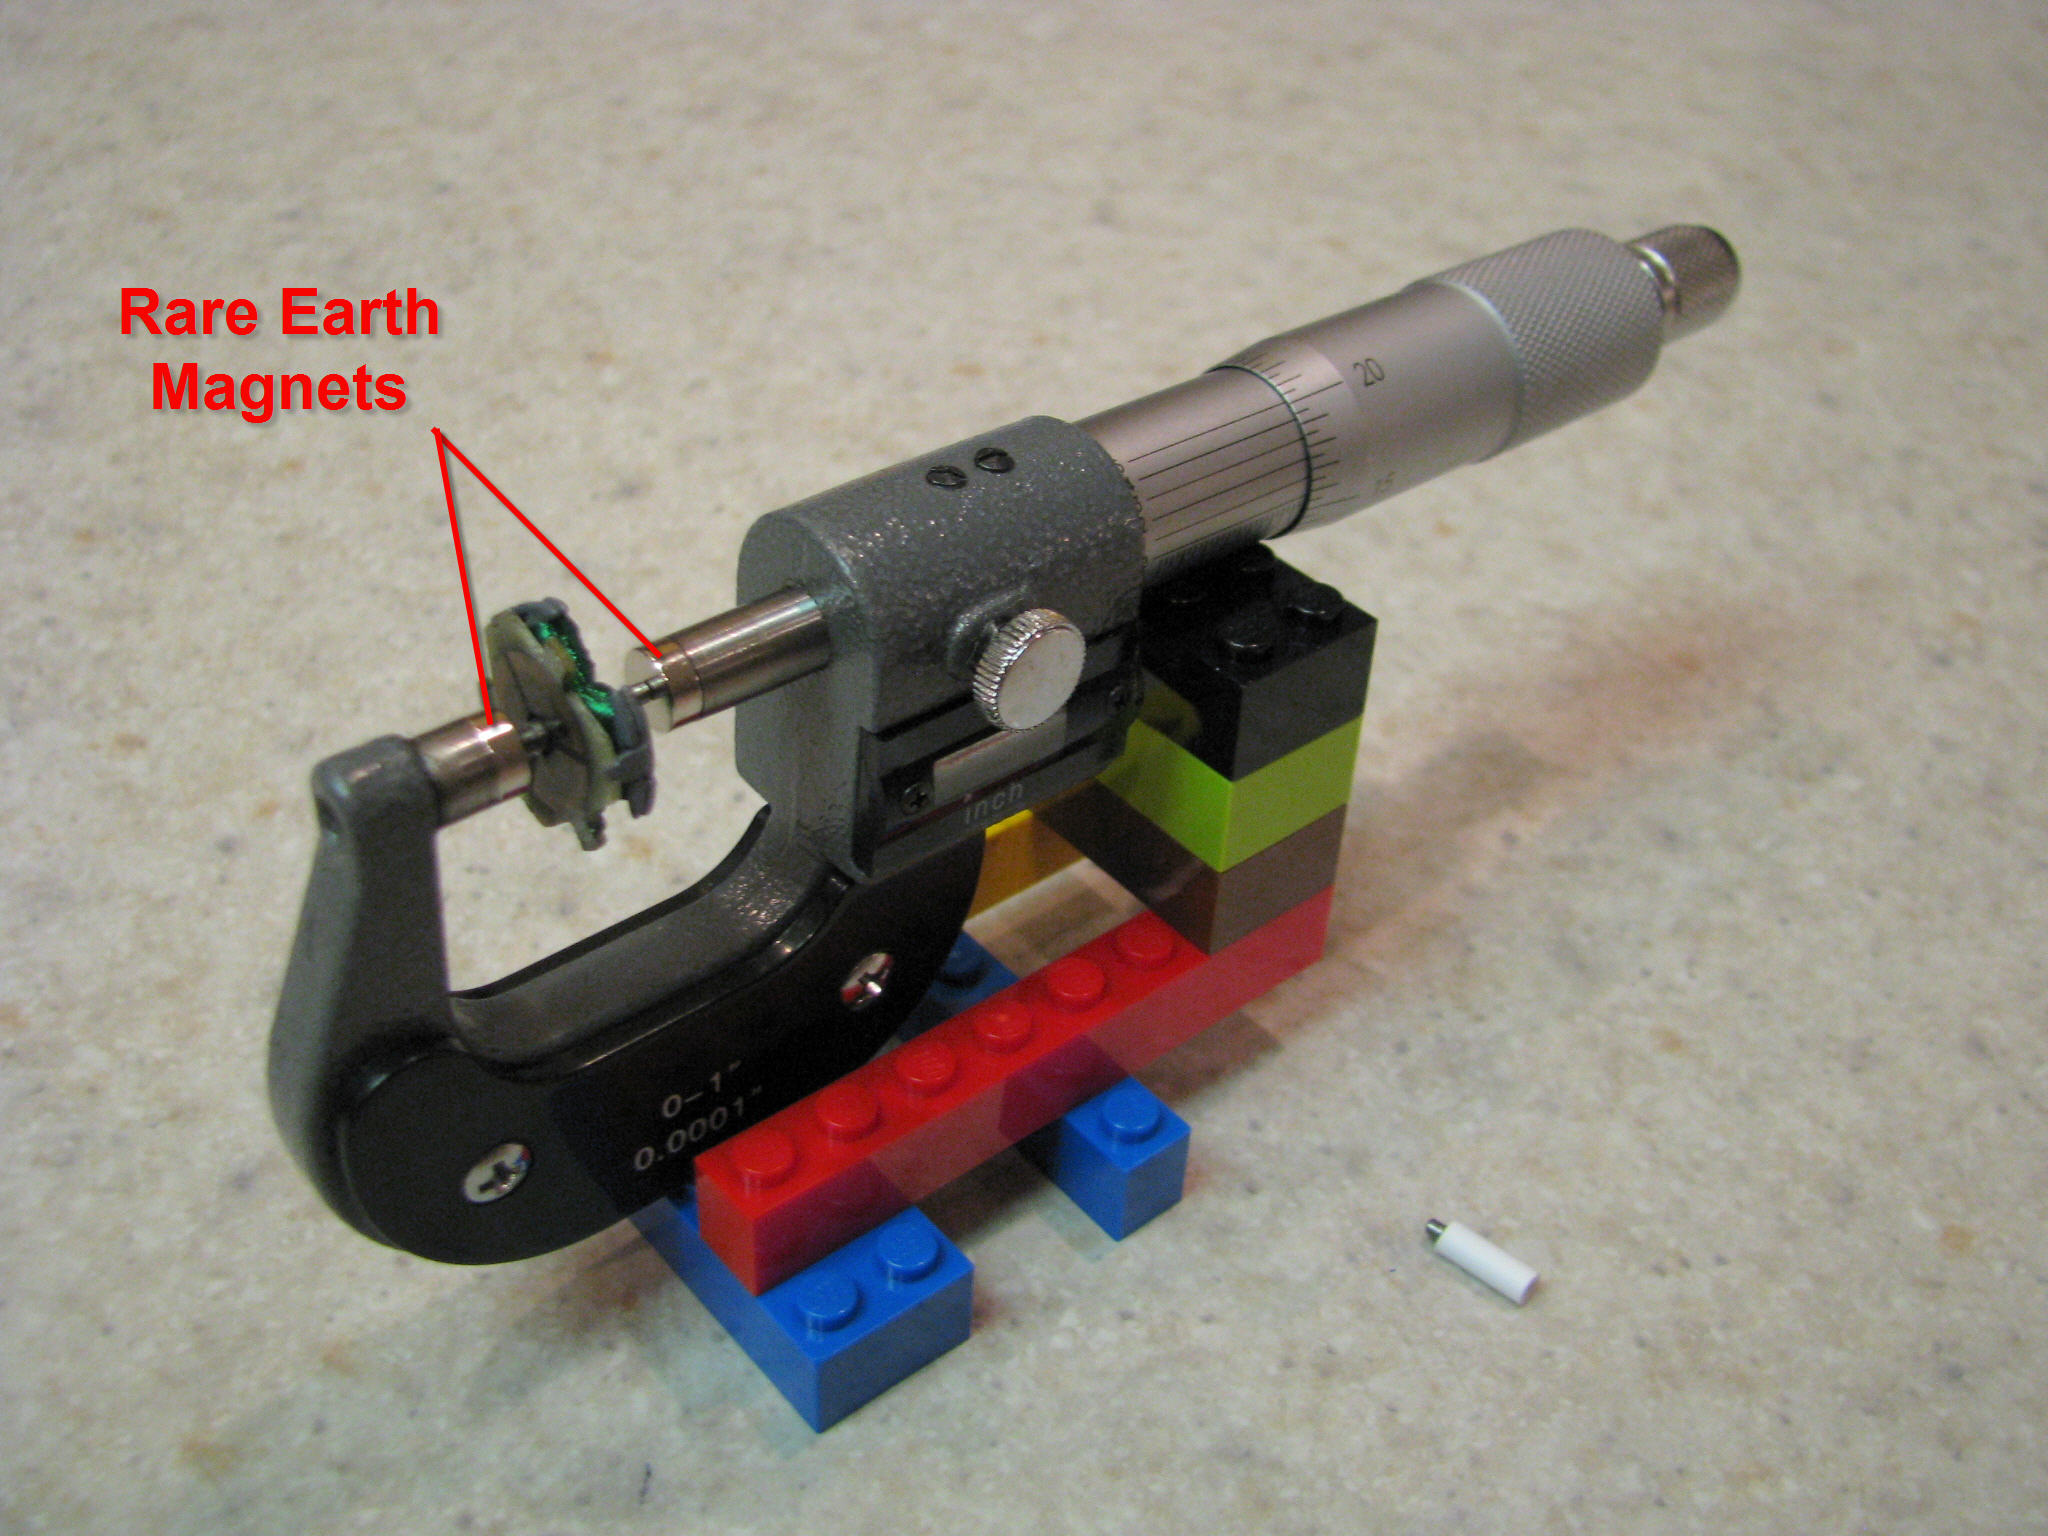
I followed jaybo's instructions and they were great! If you are interested you can read them here. Look for forum entry number 10 by jaybo. The article said to use a micrometer, two rare earth magnets and an extender made using styrene tubing. I had the micrometer, you can get one relatively cheap at Harbor Freight, the two magnets, tubing and steel I picked up at my local hobby shop for $3.00. The Legos I had, don't laugh they work! :-)

After I assembled the parts I found that the plastic tubing did not hold tight enough on the shaft of the armature and caused the armature to spin off center. Therefore I got rid of the tubing and aligned everything up directly and had much better results. The armature did not wobble and it spun more freely.
As you can see in the picture below I put the rare earth magnets on each end of the micrometer. The magnets were 1/4 inch in diameter and 1/8 inch thick. The micrometer is a 1 inch and can be purchased at Harbor Freight.
As you can see in the picture below I put the rare earth magnets on each end of the micrometer. The magnets were 1/4 inch in diameter and 1/8 inch thick. The micrometer is a 1 inch and can be purchased at Harbor Freight.
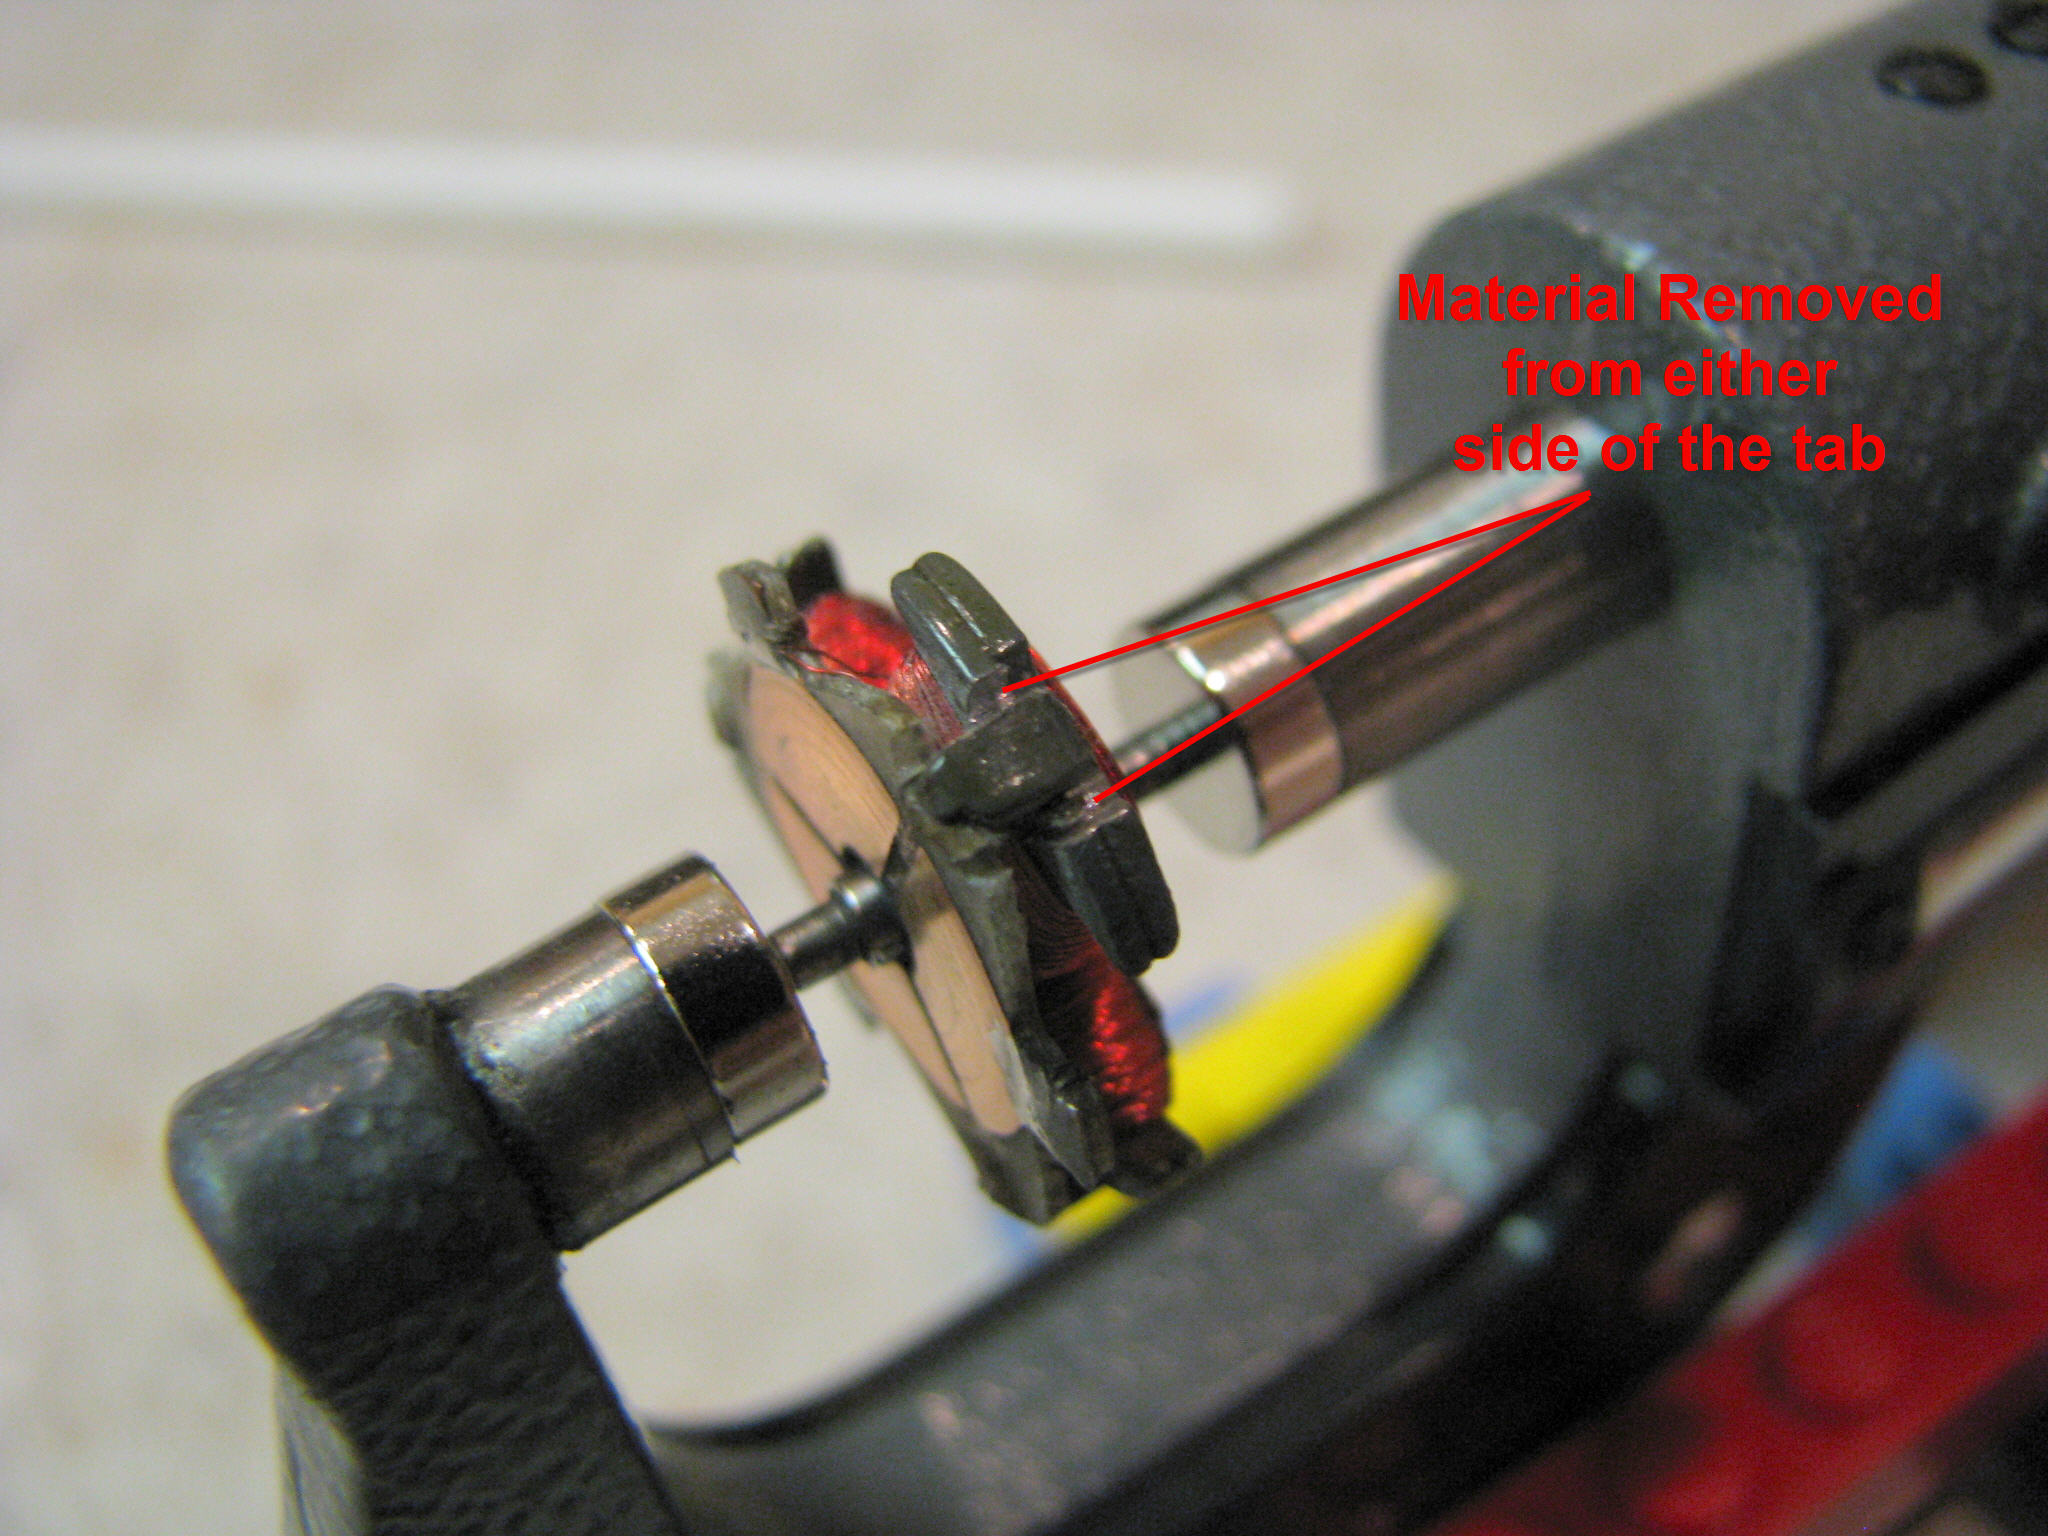
You will also need a straw to blow on the armature to spin it. You do not have to spin it fast when it stops the heaviest stack will end up on the bottom. Mark the stack with a marker and try a couple of times. It should end up at the bottom every time. This is the stack you will need to remove some material. You can use a Dremel tool with a cut off blade and slowly remove the material and then try again. Work through this slowly and deliberately once you remove too much you can't add it back!! Sometimes you might have to remove material from two stacks in order for the arm to balance. In the pictures below you will see the results of removing the stack material.
The first picture shows material removed on either side of the tab.
The first picture shows material removed on either side of the tab.
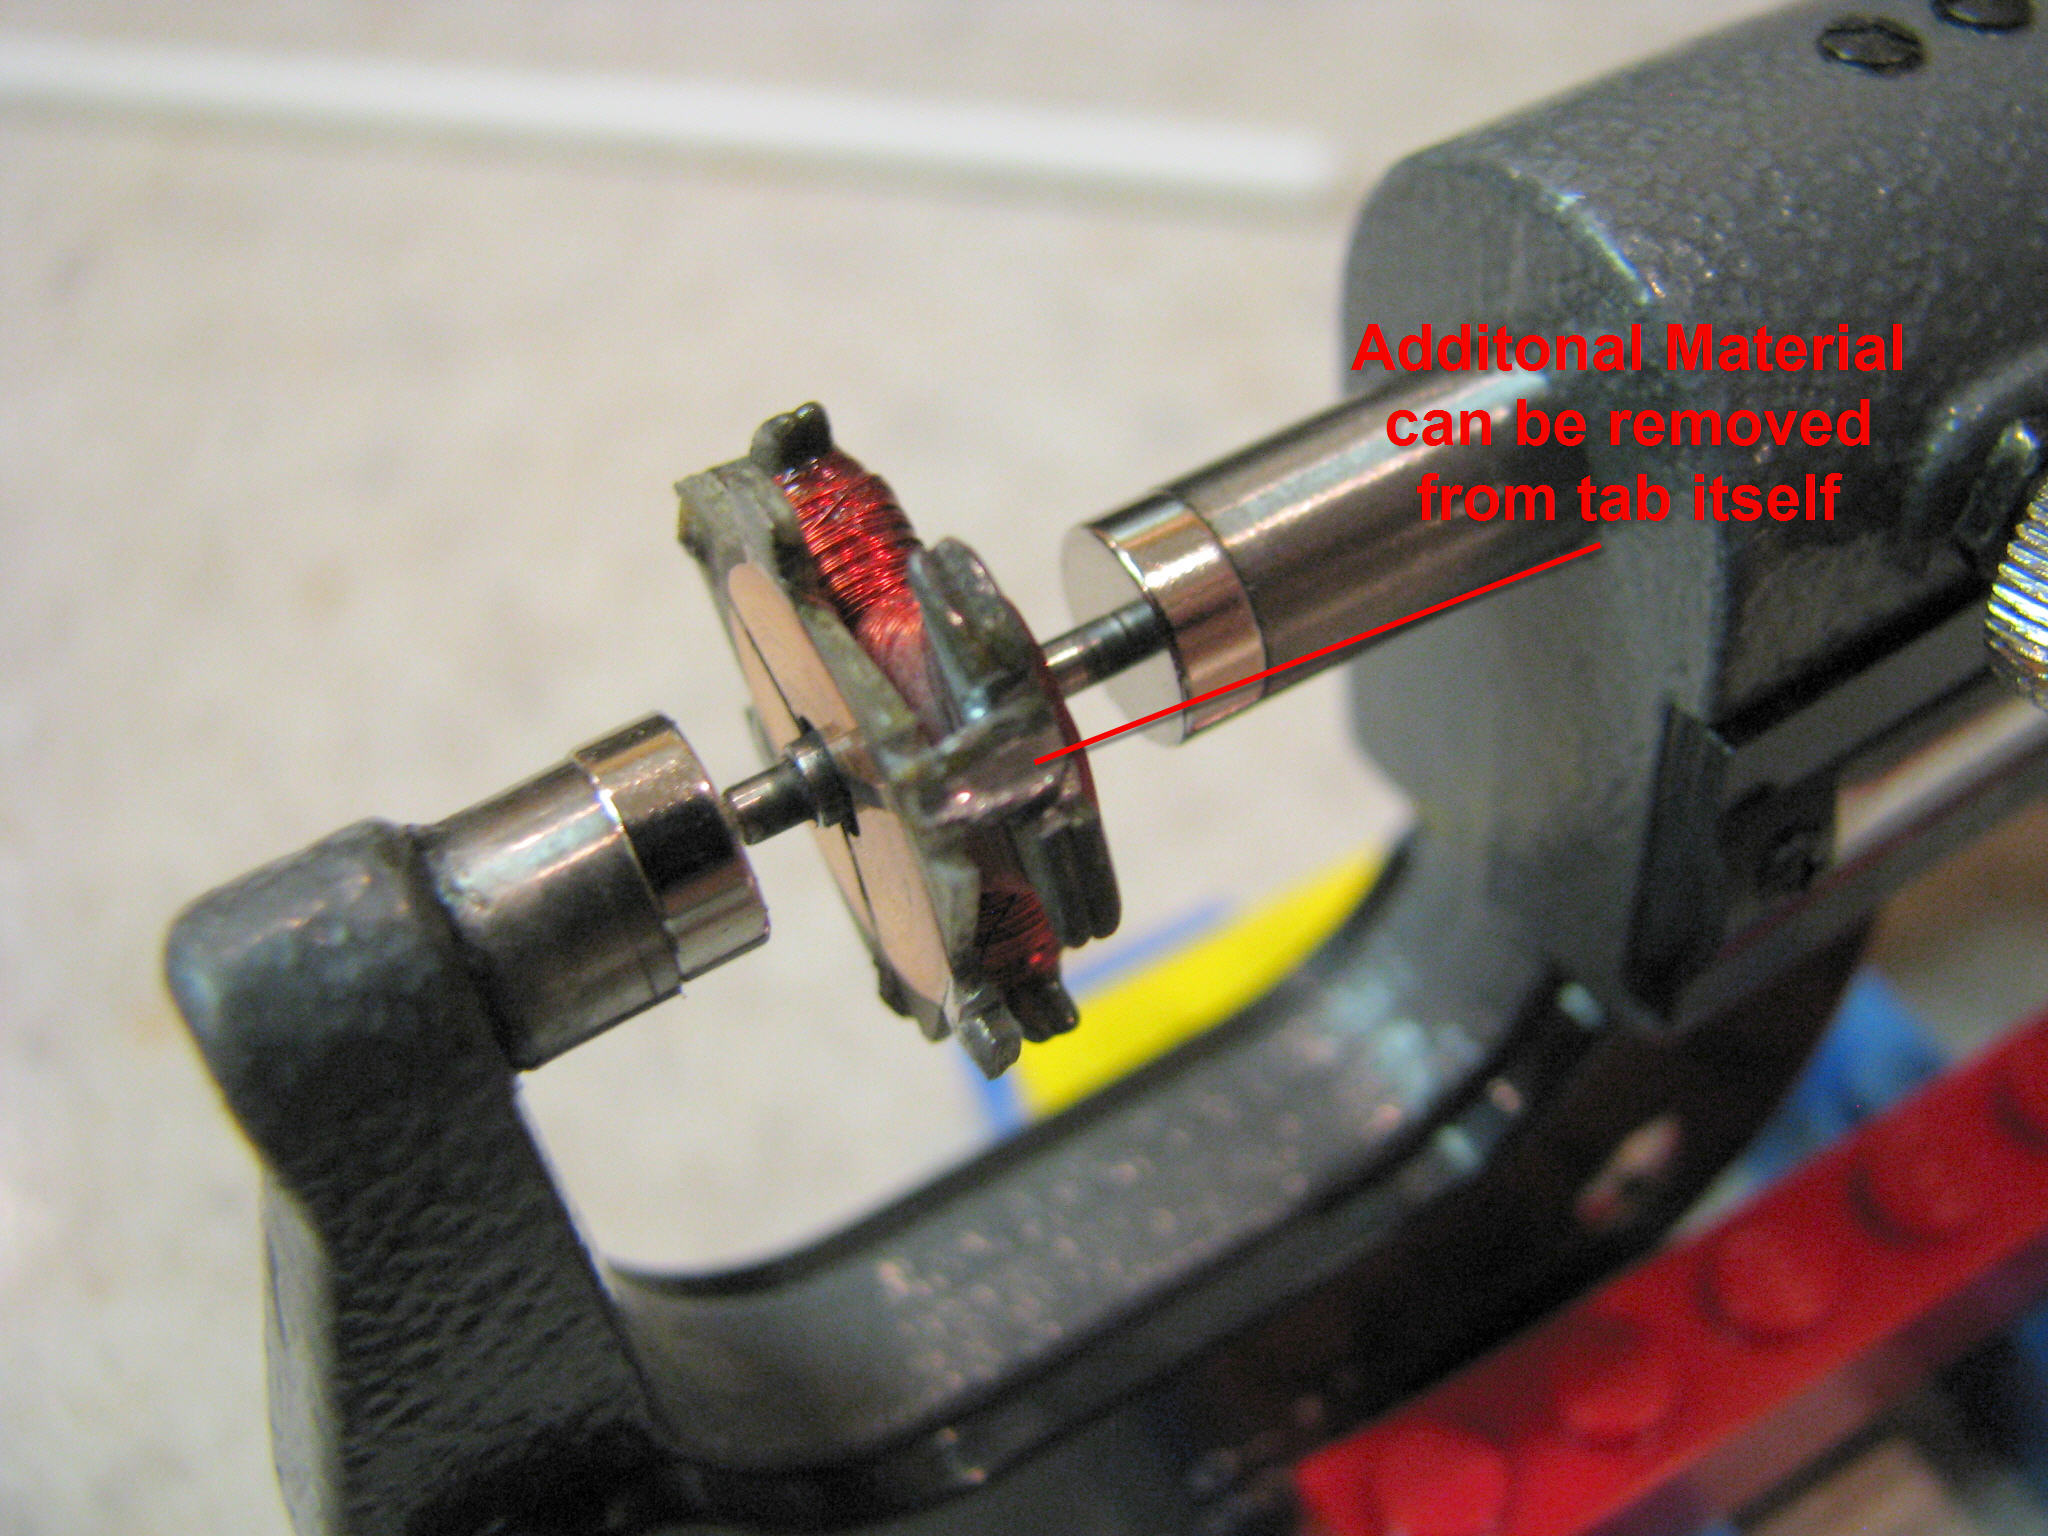
If you have a lot of material to remove then you can take some off the the tab itself as shown below.
It is science and art. As such it takes practice!! that said practice on some old burnt out armatures first. Some things I have found are:
- One end of the arm actually touches the magnet the other end actually has an air gap of about .001 to .002 inch gap.
- The arm seems to spin more freely if the long end of the shaft touches the magnet and the air gap is on the short end.
- Take your time be patient and work slowly at first.
- Practice on old bad arms first
- You will get better and faster it is an art.

Below is a video of the balancer in action... I found a "Christmas Tree" armature where each stack is a different color. You will see in the video that the gold wire stack is the heaviest and goes to the bottom. There are some indications that the the red stack might have to have a little material taken off too... but the gold stack will definitely have some material removed.
Good luck and happy spinning!!! :-)
 RSS Feed