Like most of you I was introduced to the Aurora T-Jet as a kid. Then as I got older my interests and attention were diverted to other things. After thirty or forty years I have made full circle and now have picked up this hobby again. And like you, I have found that now we have in addition to the T-Jet there is also the T-Dash and Auto World's ThunderJet. I had been resisting taking the plunge into Auto World's product for various reasons but as of late have read that The T-Dash chassis is sort of up in the air as to if it will be around much longer. So I thought I would see what Auto World's ThunderJet Ultra-G was about and if it is a chassis I can work with.
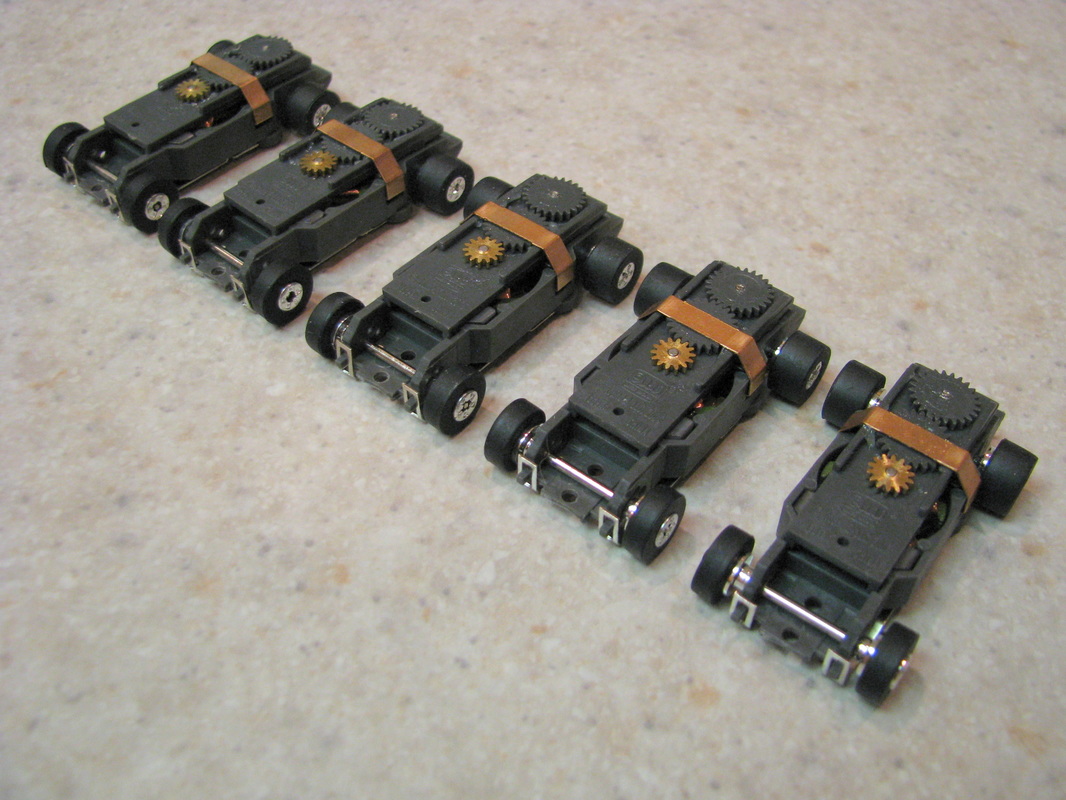
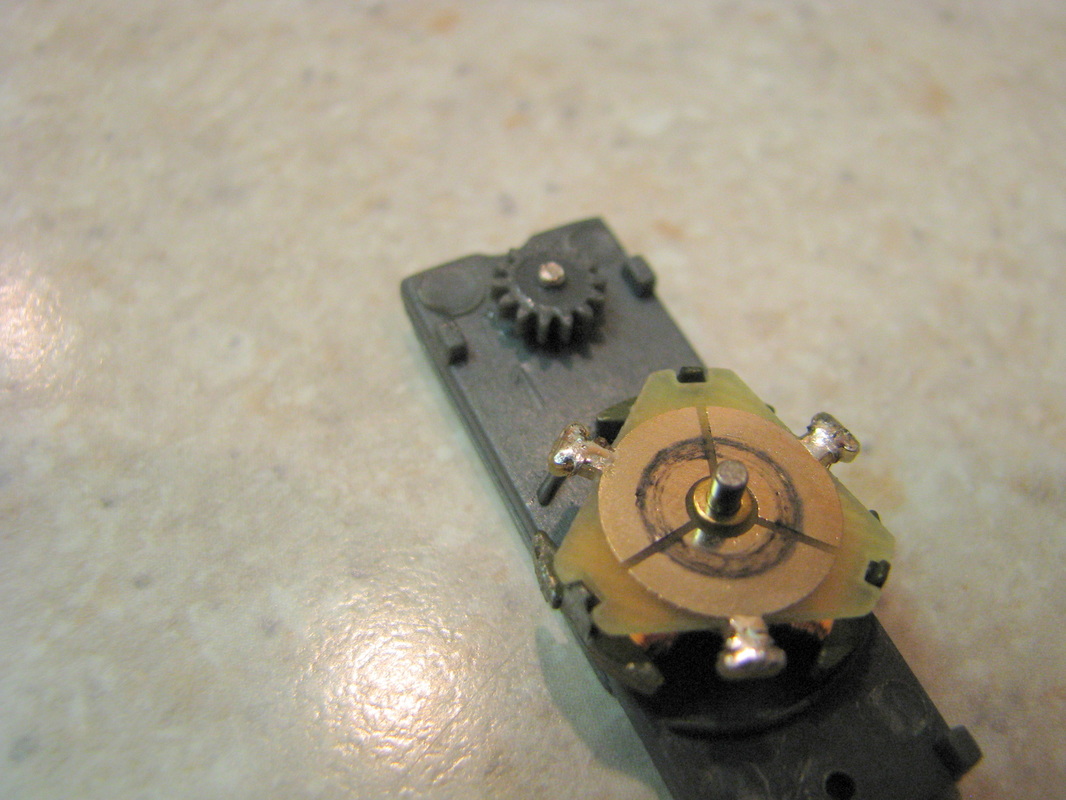
I ordered 5 chassis for sampling. All outward appearances indicated that the design was your basic pancake design almost identical to the Aurora T-Jet. The biggest difference would be that two of the gears on top of the gear plate are no longer metal but plastic. These would be the idler and driven gear. At first glance I also notice a traction magnet has been added. After further inspection I saw that the drive pinion gear is also plastic instead of metal. Other than that the conceptual design is pretty much the same as the original Aurora T-Jet.
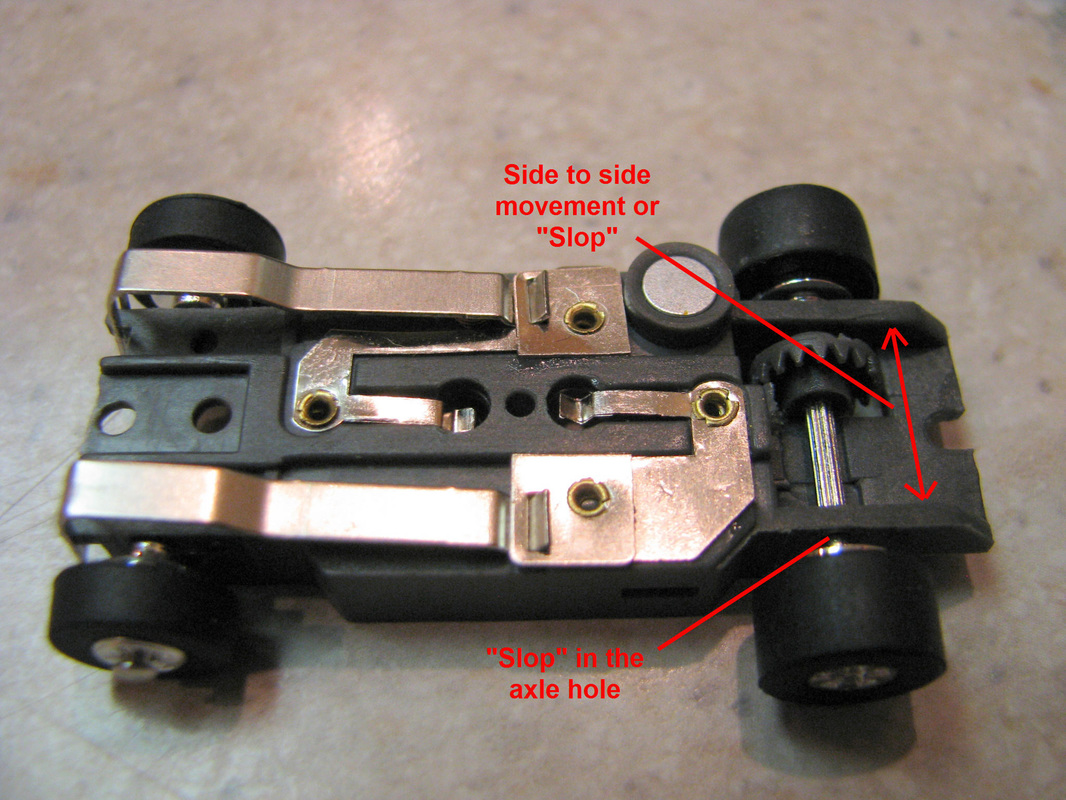
The next thing I noticed was the rear axle. There was a lot of "slop" in the rear axle both up and down in the axle hole and side to side.
I wanted to take some measurements on the chassis and it's parts to see how consistent Auto World was in their manufacturing process. So I took the chassis apart and started measuring. The first thing I inspected and measured were the armatures. I was really surprised at the consistency of the ohm readings on each armature.
| Armature | Pole 1 Ohms | Pole 2 Ohms | Pole 3 Ohms |
|---|---|---|---|
| Arm 1 | 14.8 | 14.9 | 14.9 |
| Arm 2 | 14.8 | 14.8 | 14.8 |
| Arm 3 | 14.7 | 14.8 | 14.8 |
| Arm 4 | 15.5 | 15.7 | 15.7 |
| Arm 5 | 14.8 | 14.6 | 14.8 |
The next part I measured were the magnets. I quickly took one measurement dead center of the magnet. There was a considerable amount fluctuation with the magnets. The magnets were not as consistent as the armatures.
| Magnet Set | North Reading | South Reading |
|---|---|---|
| 1 | 782 | -778 |
| 2 | 818 | -756 |
| 3 | 774 | -750 |
| 4 | 737 | -733 |
| 5 | 802 | -776 |
Now let's take a look at the brushes. As you will notice in the picture below they are not flat on both sides like the original Aurora brushes. There is a grove on one side and a dome on the other. The grove side makes contact with the brush spring on the chassis and the dome side makes contact with the commutator on the armature.
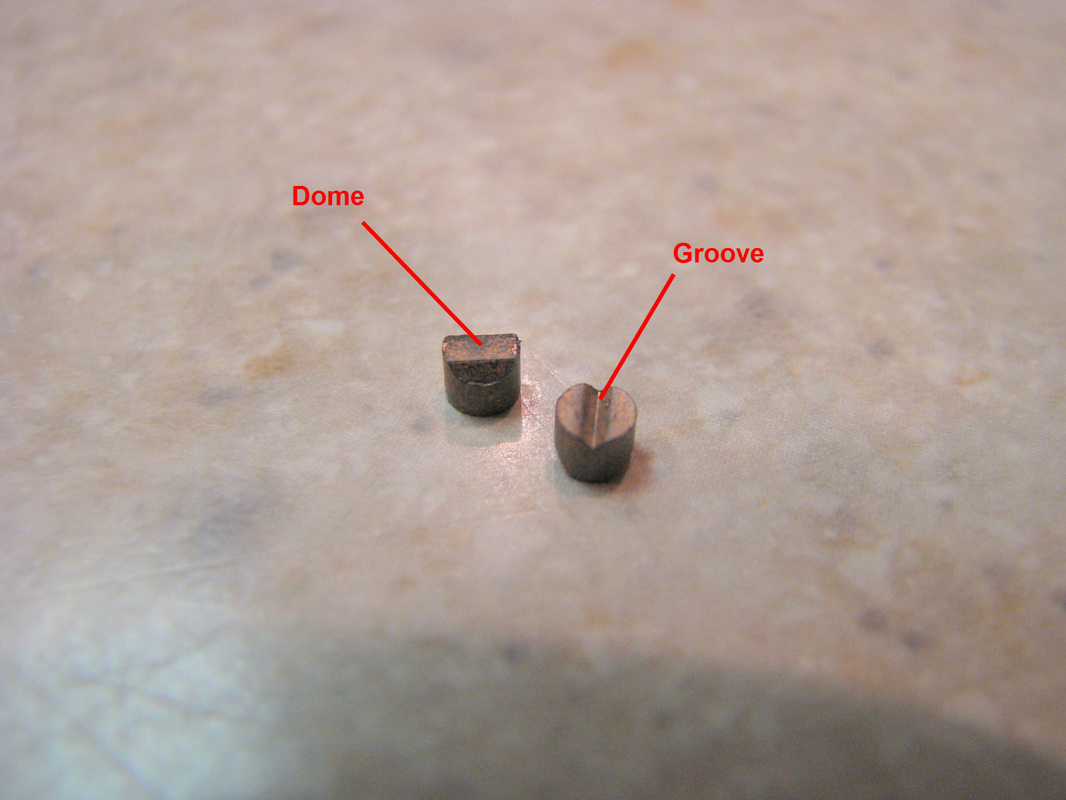
Why the groove? I think there are two reasons for the grove. The first reason is it prevents brush rotation. The more stable the brush the more stable the contact. The second reason is to increase contact surface with the brush spring which helps with current flow. Take a look at the diagram below.

I took a few measurements on the brushes. All in all Auto World's manufacturing process produced a pretty consistent brush.
| #1 | #2 | #3 | #4 | #5 | #6 | #7 | #8 | #9 | #10 | |
|---|---|---|---|---|---|---|---|---|---|---|
| Thickness | 0.091 | 0.089 | 0.090 | 0.091 | 0.091 | 0.091 | 0.091 | 0.091 | 0.089 | 0.090 |
| Diameter | 0.117 | 0.117 | 0.117 | 0.117 | 0.117 | 0.117 | 0.117 | 0.117 | 0.117 | 0.117 |
| Ohms | 0.3 | 0.3 | 0.3 | 0.2 | 0.3 | 0.3 | 0.3 | 0.2 | 0.3 | 0.2 |
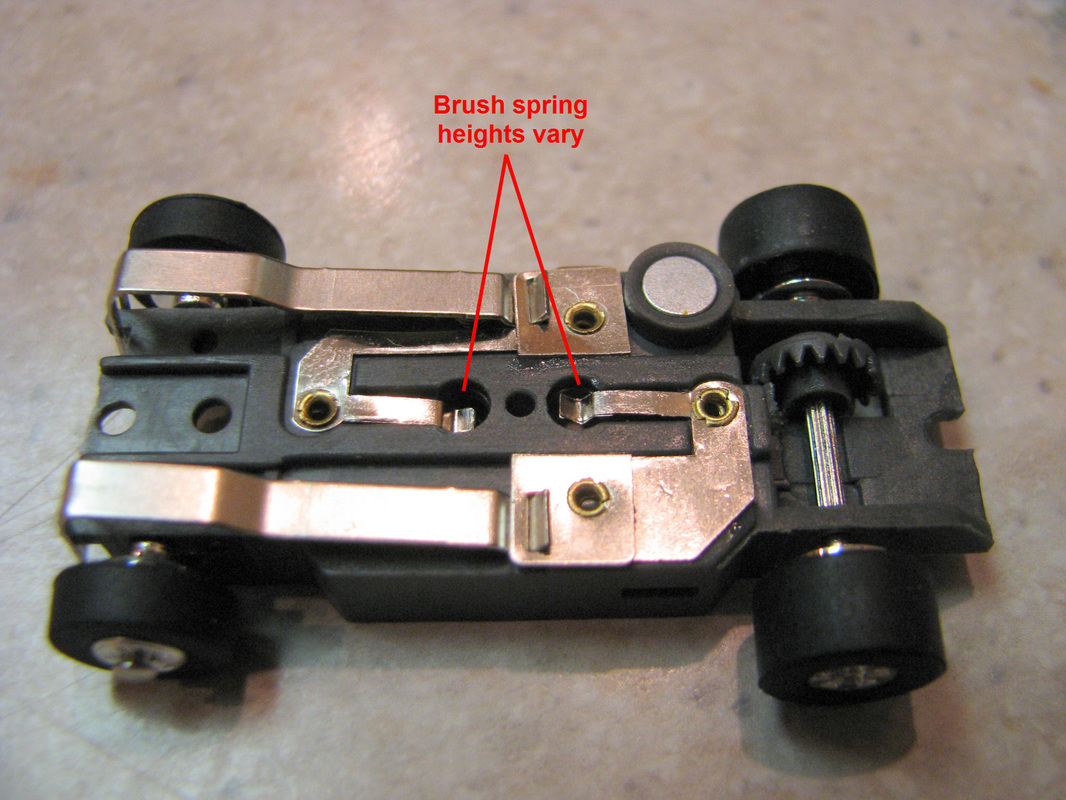
I then took a closer look at the chassis. The first thing I noticed was the variance of the commutator brush springs. No two were set the same. This told me that when setting up the chassis I will have to adjust the brush springs from the get go. Take a look at the picture below and you will notice considerable difference in the adjustment of the brush springs. The front spring is pushed further in than the one toward the back of the chassis.
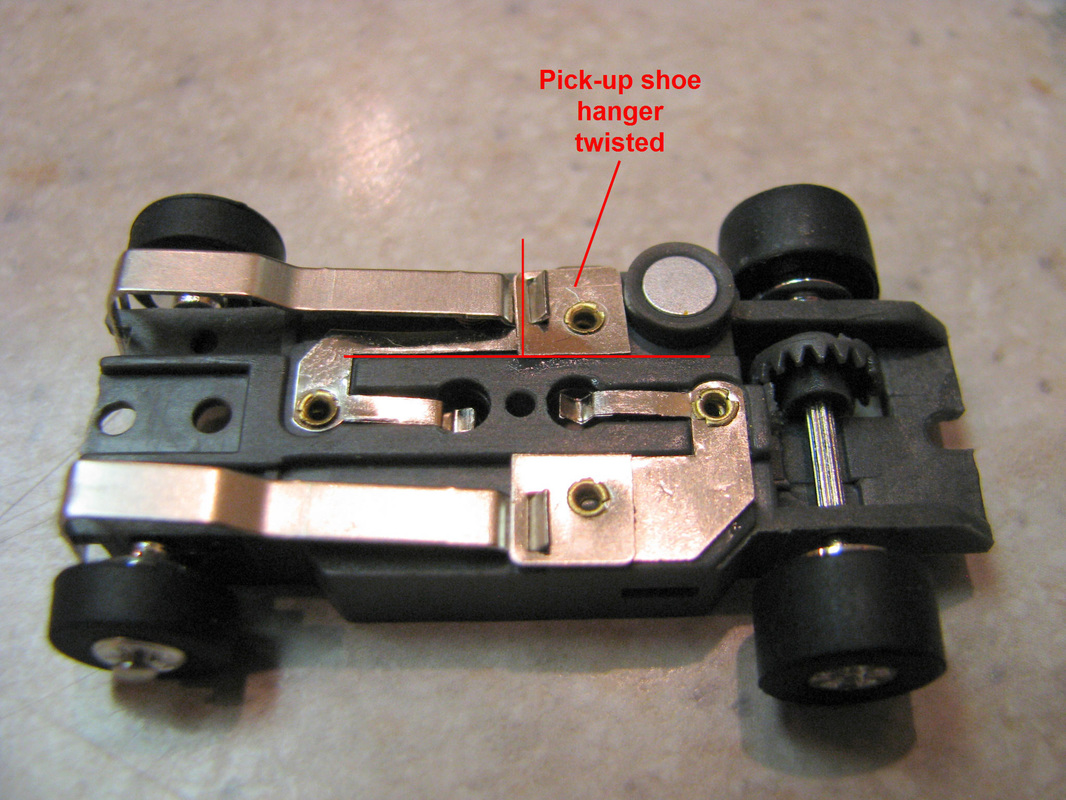
The next thing I noticed were the pick-up shoe hangers were not straight and would need adjustment.
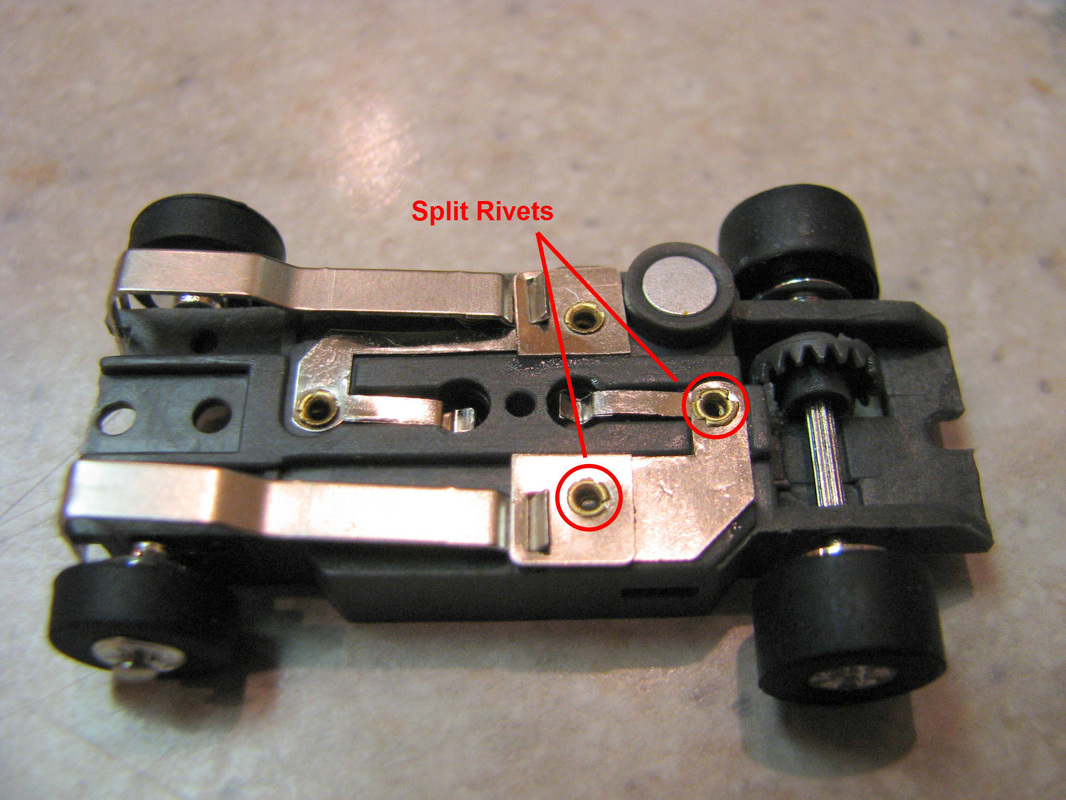
Then I took a look at the rivets in the chassis. They were not a solid circle they were split. For the average person this is probably not big deal but for the competitive racer this would be criteria for discounting the chassis. After further inspection of the other chassis the split rivets were not the norm in my sample of 5 chassis.
So I assembled a car randomly selecting the parts... oiled that puppy up and put it on the track. I found the car to be responsive and smooth. It was also pretty quiet. The lap length was 37 feet and it had times that ranged from 5.9 seconds to 6.1 seconds per lap at 13 volts using a 90 ohm controller. I found the chassis to be pleasurable to drive. This is a great chassis to introduce kids to the hobby and the Thunder Jet. The next step will be to cherry pick from the stock parts and see how much improvement I get. Then finally I will introduce some speed parts and see where that takes us. So far I think this chassis has some possibilities.
More to come... Part 2 cherry picking the parts.
 RSS Feed