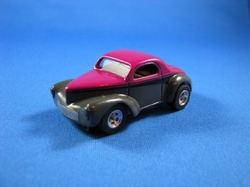
Tools Used
- Dremel Motor Tool
- Dremel Motor Tool Press
- Dremel Cutting Disk
- Car Jig
- Sandpaper 600 to 8000 grit
- Milliput Epoxy Putty (Fine)
The Car Jig
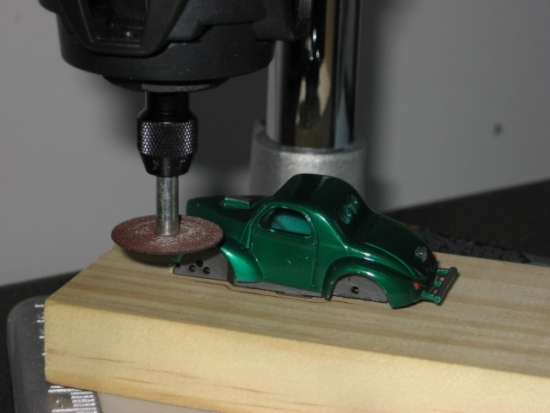
First I built a car jig. This was pretty simple and straight forward. I needed a way to securely hold the car body while I was making the cuts to the top. This jig not only had to hold the car securely but I wanted the cuts to be square with the chassis. Therefore I cut two wood blocks ¾" thick approximately 2 ½ " X 6" then joined them together so they were exactly 90 degrees. They looked like an "L". On one of the wood blocks I attached an old T-Jet chassis with two small screws that went thru the two brush holes. I also drilled two larger holes in the block that held the chassis. These holes lined up with the chassis body screw holes. This would allow me to screw the body down to the chassis from the other side of the wood block. I made sure everything was as square. This means that all sides of the wood blocks were square, the blocks joined together were square, and that the chassis sides were square with the edges of the wood block. It is important that everything is square from the start that way when you start putting the top back together it will be much easier and the top pieces will line up. By using this jig I can flip the jig in almost any direction and in combination of positioning the Dremel either vertical or horizontal my cuts will be square with the chassis.
First I built a car jig. This was pretty simple and straight forward. I needed a way to securely hold the car body while I was making the cuts to the top. This jig not only had to hold the car securely but I wanted the cuts to be square with the chassis. Therefore I cut two wood blocks ¾" thick approximately 2 ½ " X 6" then joined them together so they were exactly 90 degrees. They looked like an "L". On one of the wood blocks I attached an old T-Jet chassis with two small screws that went thru the two brush holes. I also drilled two larger holes in the block that held the chassis. These holes lined up with the chassis body screw holes. This would allow me to screw the body down to the chassis from the other side of the wood block. I made sure everything was as square. This means that all sides of the wood blocks were square, the blocks joined together were square, and that the chassis sides were square with the edges of the wood block. It is important that everything is square from the start that way when you start putting the top back together it will be much easier and the top pieces will line up. By using this jig I can flip the jig in almost any direction and in combination of positioning the Dremel either vertical or horizontal my cuts will be square with the chassis.
Work from the Ground Up on the car
Channel first, section second, and chop last, it is important that you work from the ground up so to speak. Before I started thinking about chopping the top I knew I wanted to lower the body on the chassis (channeled). It is important that this was done first. That way when I attached the car to the chassis on the jig the car would be sitting on the chassis as it would normally. Then if you are considering sectioning the body of a car you would do that second and then lastly chop the top.
Where to make the horizontal cut
The next consideration is where to cut the top. Well that pretty much depends on the car but I do recommend that where ever you decide to make the horizontal cut if at all possible make it at the same height all the way around the top (front, back, and sides). This will help maintain a consistent finish height where the two ends of the top will meet in the middle. This should make for easier filling and sanding when joining the top back together.
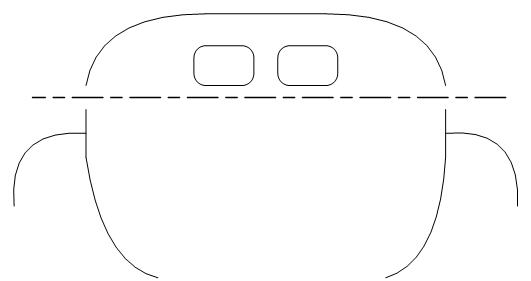
Other considerations of where to make the horizontal cut are to try to make the cut where the lines of the top are as straight as possible. In the above diagram (Diagram 1) you will notice that I sectioned my car just above the lower corners in the door window that way you have a flat surface to reconnect the top and still maintain the curvature of the lower corners of the windows. With the cut that crosses the center of the top, the same considerations were used; make the cut in the center of the top away from the upper curvatures of the door windows. Again, this way you can maintain the curved lines of the car. An additional consideration was the two small rear windows of the 41 Willis. I wanted to keep the split window intact so this played into where to make the cut also. So my horizontal cut was a horizontal line all the way around the top that was about 2-3 millimeters above the front windshield posts and just at the bottom of the rear split window. I had to take out the lower 1-2 millimeters of the rear split windows. I had to make a judgment call here and I am sure this is where it will vary depending on the car. My school of thought is it is easier to reconnect straight flat surfaces than trying to connect curved surfaces. An additional consideration was how much material to remove. I chose to remove the width of the cutting disk (disk kerf). Please keep in mind that for me I had to blend practically and art here. I have found the thing about cars whether they are 1:1 or HO it’s about mechanics, science and art.
What sequence to make the cuts
When making the cuts on the top you should consider in what order you make the cuts. I chose to make the cut down the center of the top first. That way the remaining two pieces of the top were still connected to the car body which makes it easier to cut. You don’t have to worry about holding the pieces you can concentrate on just the cut.
When making the cuts on the top you should consider in what order you make the cuts. I chose to make the cut down the center of the top first. That way the remaining two pieces of the top were still connected to the car body which makes it easier to cut. You don’t have to worry about holding the pieces you can concentrate on just the cut.
The second and third cuts were the front window posts. I carefully cut the first front window post and then was extremely careful when cutting the second front window post because I did not want the top piece to go flying off somewhere.
The last cut was the cut around the back of the top. I started on one side of the car and worked my way around to the back of the top and then around the other side of the top. It was much like using a can opener to open a can.
Again, with all these cuts I have not changed the height position on the Dremel motor tool relative to the car so the horizontal cutting plane is the same height for every cut.
Again, with all these cuts I have not changed the height position on the Dremel motor tool relative to the car so the horizontal cutting plane is the same height for every cut.
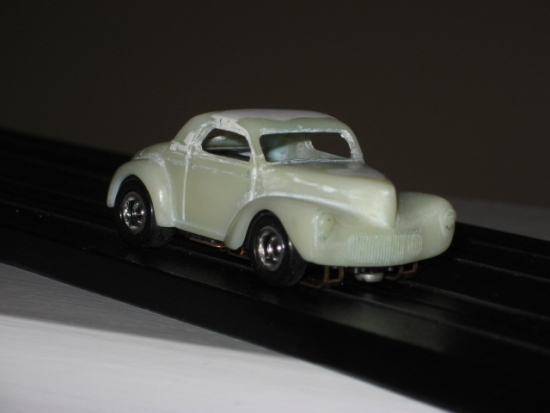
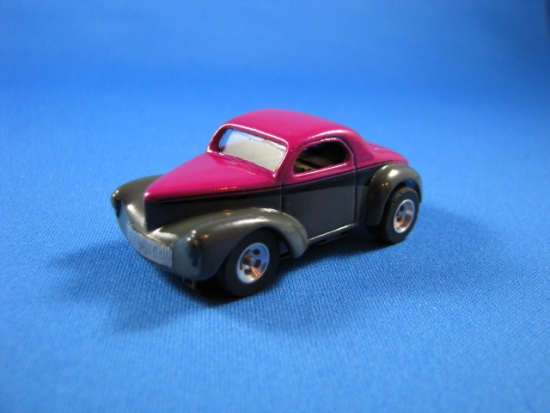
Now that you have cut it all apart it’s time to put it back together. My biggest considerations were to line up the door and window seams. Again this is where the art comes into play. You will have to look and study as to what looks the best in the overall stance and presentation of the car as well as your modeling skills (mine are limited). Once you have glued the pieces into position, you can then use putty to join the two tops back together and start sanding. I use Milliput epoxy putty. It is fairly easy to use, it has a long work time, and when left over night you can sand it, drill it, and shape it, and polish it.

 RSS Feed